What Makes Me Valerie
  • Welcome
    • General Blog
    • Disclosure
    • Contact
  • Over 40 Travel
  • Teatime With Valerie
  • I Love Baseball

July 25th, 2018

7/25/2018

1 Comment

 
Picture
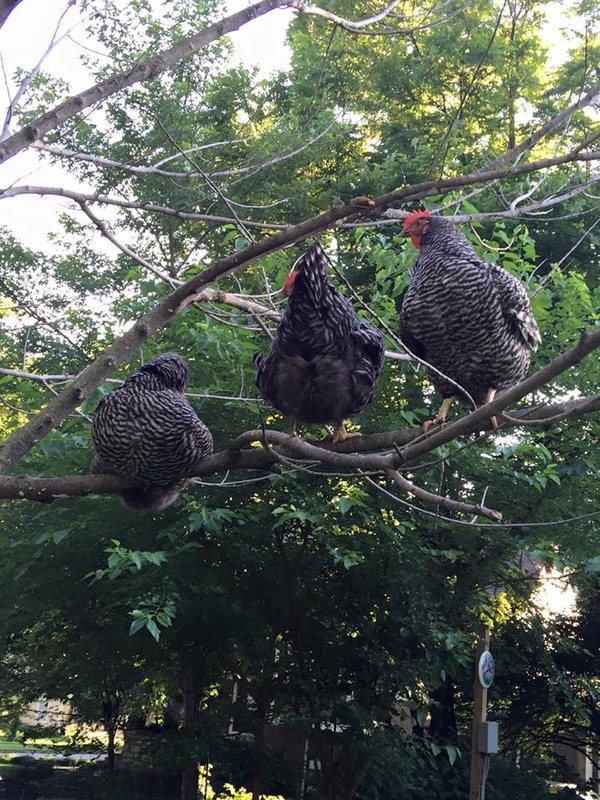
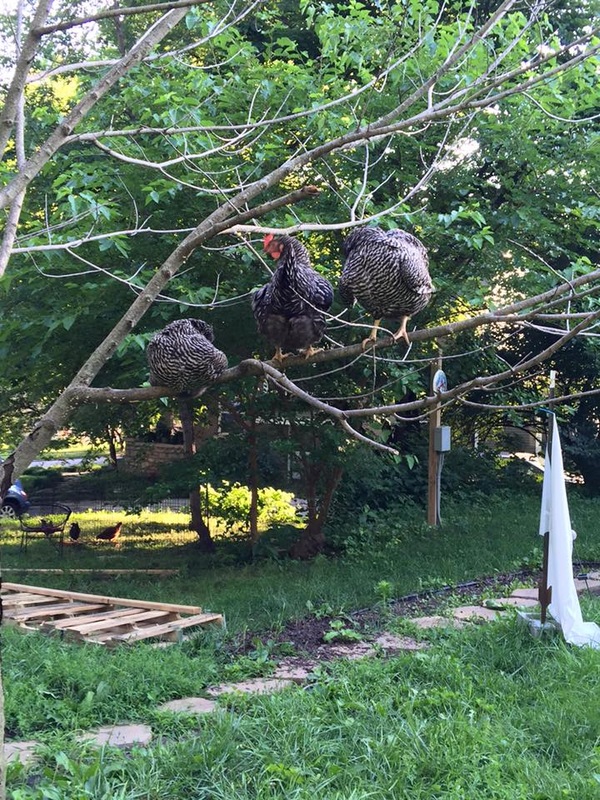
.When I first decided I wanted chickens, I knew I was fighting a battle with my husband.  He didn't want them...I did.  He wouldn't help...I'll do all the work.  I was able to dispel all of the myths he had heard about backyard chickens, and now that we've had chickens for over 3 years, even he realizes having backyard chickens is even better than he expected.  I'd like to share with you some of the myths I dispelled with him, that caused him to give this hobby a chance.

​1.  I don't have space for a coop.  I have the mansion of all coops, but I'm in the minority.  You can get all in one chicken coops and yard fence in a small space, which easily houses 4 chickens.  I started with the Pawhut 88" coop which is really a small amount of space.  We kept it in the small corner of our backyard, and it was just fine.  I didn't build the "chicken mansion" until I had 6-8 hens.

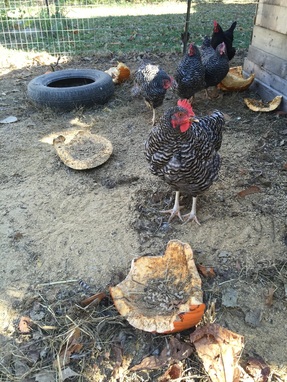
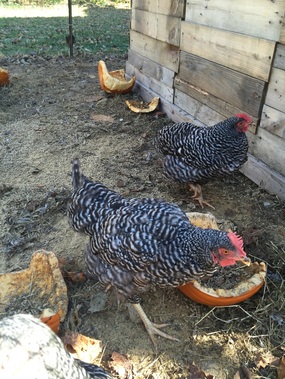
2.  It's expensive to own chickens.  I've found quite the opposite.  Once my hens started laying, I was able to sell enough of my eggs to pay for their food.  Yes, I spent about $100 to get started, but since then, I have barely spent anything. In fact, my chickens are garbage disposals in their own right.  If I have bread that went bad, or if I have extra fruits or vegetables, or watermelon and pumpkin rinds, they are more than happy to take care of them for me!  My reward?  Amazing compost.  But that's another post.

​3.  Chickens smell.  That is mainly due to the poo.  I've found that when I compost their waste, I can control the smell.  If your coop starts to stink, you can add herbs to combat the smell.  I have mint in jars on the outside of the coop...I'll snip a piece, dry it, and crumble it in their coop when things start to get smelly.  If you want quicker relief, you can use a coop deodorizer.  I've used the Mana Pro Coop and Compost Deodorizer.  It natural and doesn't harm my hens if they happen to taste it.    

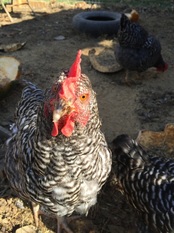
4. Chickens are mean.  I've never had a mean chicken.  Of course, I spend time with them from the second I bring them home, and they grow up used to both humans and dogs.  My chickens like to play and "talk" to me, and the only time they peck at me is when I have a treat in my hand (or I'm wearing colorful nail polish).

5.  I don't have time.  Chickens take up very little time.  Even when I travel, my chickens are easy to take care of.  You can use large feeders (although we made our own out of large PVC piping and a lid...we have 3 of these), a self opening coop door (you can buy one here or spend less money and DIY with these awesome plans)  and a 5 gallon waterer .  I've also been known to pay helpers with $10 and all the eggs they collect.

Now that we've had chickens for nearly 4 years, even my hubby gets excited when hatching season is upon us.  He enjoys watching them run around, and he has even learned to play with them.  I daresay, he likes them ALMOST as much as I do!  I hope I've pointed out how rewarding backyard chickens are.  If you have any questions, or have any backyard chickens myths you want me to dispel, I welcome your feedback below!

1 Comment

May 02nd, 2017

5/2/2017

1 Comment

 
My gardening focus is changing this year.  Instead of focusing on my food garden, I must also start preparing my yard for sale.  We are listing our home for sale next winter, and we need to get "curb appeal" to attract buyers.

My house is 117 years old.  It's been named a Century House in the historic Jewell district in our town.  The people we bought our house from lived there for over 50 years.  She was an avid gardener.  He was a state conservationist.  Needless to say, our yard was beautiful...before I got my hands on it.  The first two years we lived in our home, we never knew what would bloom.  We had everything from phlox to iris.  From tulips to tiger lilies.  From beans (true story!) to blackberries.  This yard was just a garden delight.

But, I'm not that good at flower gardening.  I thought the blackberries were weeds and I whacked them.  Then I cried when I realized what I had done.  I let the tomato patch grow over.  That was kind of planned, though, since I wanted a raised garden in a different part of the yard.  I trimmed the 2 story bushes in our front yard, in hopes of planting a garden that never happened.  And unbelievably...I killed our phlox.  HOW do you kill PHLOX?!?

we have a beautiful garden on the corner of our front yard.  My dream was to plant really pretty annuals there every year.  That never happened.  Every so often, something will pop up in the garden...tulips, irises, etc.  But for the most part, it looks like an awkward part of our yard.  That has to change quickly.

Time has run out.  My neighbor, who is a gardening genius, is going to come over and help me landscape my backyard.  It's nearly half an acre, half of that used to be a tennis court so it's flat and unhealthy (it's where we have our hot tub and fire pit), and there are nooks and crannies that could really be used for something beautiful once we move the chickens and the hot tub.  I know I'll be shopping, and I'm hoping to plant and maintain prettier perennials that are low maintenance so I can focus on selling the house next year.

So how am I planning my planting?  I'm using these steps:

1.  Use a garden planning tool.  I prefer online and free, of course!  With the Better Homes and Garden's Free Interactive tool.  You can use it here:  Better Homes and Gardens

2.  Find a nursery that you trust.  Whether it's a big box place like Home Depot or Lowes, a local nursery like Family Tree Nursery in the Kansas City area, or an online nursery.  I like The USA Nursery because the prices are great, there are great guarantees, and the prices are really discounted.  Plus, the website is really easy to navigate.  And if you click on this link, The USA Nursery is also offering 3 free additional plants What Makes Me Valerie blog readers!


1 Comment

Guest Blogger: Lory

3/2/2017

1 Comment

 
Picture

Note:  I periodically see posts that really catch my eye.  If I can, I ask these people to allow me to share their wisdom here.  This post comes from my junior high and beyond friend Lory, who performed this experiment with her chickens and generously allowed me to share the results. Thanks, Lory!

●●● I just tested 6.5 dozen eggs collected from our coop from early Nov - Jan. Only 4 bad ones, all dated early November!

●●● Then, I tested the 3 eggs mom had in her fridge (store bought in January). All 3 were bad and floated even more than our eggs from Nov. 

●●● In case you didn't know, you can "float test" your eggs to see if they are safe for consumption...and you should! If they drop to the bottom of a water-filled receptacle, they are GOOD. If they FLOAT, they are full of gas due to decomposing...and you should throw them away.

● ALSO...Free-range chickens are just healthier and their eggs are better preserved due to a natural egg film (invisible) that is immediately washed off of commercial-eggs taken to stores Then, they travel here, there and everywhere before you see them in the actual store. We also use a special food that's healthier for laying hens. Biggest difference, free-range birds are happy & healthier. Anyone who's tried free-range eggs can confirm that they TASTE a gazillion times better.

​

Picture
Photo: Courtesy of Lory Rodak Used with permission
1 Comment

Helpful Hint from a Guest Writer

4/19/2016

1 Comment

 
Picture
From time to time I will ask guest bloggers or guest writers to be a part of the blog.  One of my friends. Pat, just posted a great gardening tip that I'm sharing with you.  If you have any gardening tips, just post them in the comments below, so I can share them with everyone!
Working in the yard? I have a little helpful hint to share with my garden loving friends. Before I put on the garden gloves and play in the dirt First I put on some lavender hand lotion. This helps to keep my hands softer and the dirt from getting ground on dry hands. Next,I drag my nails across a soap bar just enough to comfortably fill the space between nail and finger tip. This creates a barrier filling the space from compacting dirt while I garden . When I wash my hands and use a little scrub brush the dirt comes our easily! ​
1 Comment

Preparing Garden for Planting in March

3/16/2016

1 Comment

 
Picture
It's March!  You can feel Spring in the air.  Here in Missouri, we are already experiencing 70* days, sunshine, and flip flop weather.  Although we're in a drought, we are supposed to get some significant rain this week.  I'm itching to go outside and start planting.  However, I know that we will most likely have one more freeze before Spring arrives for real.  Since my green thumb is itching, what can I do to get my garden ready for harvest?  Here is my checklist:
​_
  • Plot your garden  
    • What do you want to plant?  
    • How much will feed your family?  
    • Are you planning to preserve?  
    • Which of your plants are companion growers?
    • When do you need to plant each crop so that they harvest near the same time?
    • Spaces to Grow is a really great resource.  You can plot your garden, add your zone, and know exactly when you need to plant or transplant your seeds and seedlings.
  • Prepare your garden
    • ​This is a great time to build your raised beds.  They tend to heat up more quickly in the springtime, allowing for better plant hardiness. Raised gardens are easier to take care of, and allow for more productive square foot gardening.
    • Rake all your leaves and any thing that has grown in your garden over the winter.
    • Mix in your compost
      • If you have chickens, then you have ready made compost!
      • Did you try the Exotonic Green Cycler that I talked about in an earlier post?
      • Do you have friends who compost?  Ask them for some compost tea!
      • Scout Craig's List for people getting rid of compost.
      • Last resort...purchase compost from a retail establishment.
    • Add soil
    • Rake through to mix everything.
  • ​Prepare your plants.
    • Check over your vertical garden trellises
      • Repair any broken shelves or brackets
      • Purchase or find your soil and compost
      • Make sure you have the garden space for the seedlings you have
      • Plan your garden setup
      • Consider The Garden Tower Project  
    • Microfarming
    • Do you want to use starter plants?  Thesw are plants that have already been seeded.  When you buy them, they are already sprouting from the soil.  You transplant them into your garden.  Sometimes you pull them out of the starter pot (usually a plastic box).  Sometimes you get a biodegradable pot that you just just plant in your garden.  These plants can be found at any home and garden store like Lowe's and Home Depot and local nurseries.
    • ​Do you need to order seeds?  Now is the time to start!  This is the time to pre plant your seeds indoors.  I will will be explaining some easy ways to do this in a future post.  Here is a list of my favorite places to purchase seeds:​​
      • Summerstone Nursery_
      • Irish Eyes Garden Seeds
      • Gurney's
      • Burpee Seeds

There you go!  That's all you need to get your garden ready in March!  


1 Comment

Squirrels...in the coop?

3/2/2016

0 Comments

 
Picture
When I came home from work the other day, I was greeted with all of my chickens, out of the coop, running towards my car.  They were yapping and yammering, all trying to tell me the story at the same time.  They didn't appear to be hurt, but I couldn't figure out why they were all outside!  I decided to investigate.

As I looked at the coop, I realized there was something inside.  As I came closer, I saw...a squirrel!  It had a handful of feed in its hands, and was quickly stuffing the found goodies into its mouth.  Now, I don't mind squirrels.  They are my sorority mascot.  They like to pose for pictures.  They are all over my backyard, so I have learned to live with and love them (as long as they don't reside in my attic, which they don't, or chew on the power lines, cutting the electricity to my home...which they've done).  I've been known to take nuts to the back of our yard and share them.  But squirrels near my coop stealing my girls' dinner?  That's crossing the line!  Apparently my girls agreed with me, too.

But wait a minute!  How did a squirrel get IN the coop and pen...and how did my chickens escape?  More sleuthing was needed.  

A quick look around answered that question.  We have used a bifold slatted door for the front entry.  In the heavy winds we've had recently, some of the slats must have blown loose, creating an opening just large enough for the squirrel to enter, and the girls to escape.

I had realized a few weeks ago that the door wasn't a good door for the coop.  I had planned to spend part of spring break building a new door out of pallets.  But it was mid-February, and we needed something now! I stapled some hardware cloth over the door.  We've been blessed with really good weather, so I am not too concerned about the girls getting cold, especially since the groundhog said spring is springing soon.  Because I'm enjoying seeing into the coop better, I've decided to add a window to the door when I make it.

The squirrel found its way out of the pen, mouth filled to bursting with layer pellets.  My girls, who had followed me back to the coop, marched inside, gossiping about the squirrel and yapping about the missing food.  All ended well, and I learned a lesson about using strong doors in the coop.
0 Comments

The Garden Tower Project

2/24/2016

1 Comment

 
Have you heard of the Garden Tower Project?  This is amazing!  It has the potential to take urban or microfarming to a new level.  You can vertically plant up to 50 different plants, all while water recycling, self fertilizing, and composting, in a 4 sq' space!  This is a great resource for microfarmers, apartment gardeners and small backyard growers all over.

This small but ever growing company has built its roots (ha ha...get the pun?) on the same principles that I believe:  self sustainability.  Much of the founding of America came from agriculture. A hundred years ago, everyone had their own garden and planted their own foodstuffs.  As late as World War 2, the US government supported growers as Victory Gardens were planted so that people could sustain their rations throughout the war.  Fast forward to 2016, when people are actually getting in legal trouble for growing vegetables in their own backyards.
  • In 2010, a Georgia man was fined $5,000 for growing organic vegetables in his own backyard.
  • In 2011, a Detroit area woman faced jail time for a front yard tomato, zucchini and herb garden.
  • In 2012 this Tulsa woman came home to find city officials destroying her edible garden and trees.
But what if you could have a non permanent garden that still produces plenty of food, and is attractive in your yard? A container garden that could conceivably be moved indoors during the non growing seasons?  A modern garden?

The Tower Garden 2 is a gorgeous terra cotta self composting, water recycling garden tower.  Instead of horizontal gardening, you plant vertically, thereby creating a self contained microfarm in a small space.  The garden is perfect for a small backyard setting, and can even be used as a base for other landscaping projects.  Take a look at these gardens that other Tower Garden users have created!
The Garden Tower Project facebook photo album
a target="_blank" href="http://shareasale.com/r.cfm?b=718621&u=443036&m=52284&urllink=&afftrack=">Garden Tower 2 50-Plant Composting Container Garden
Terracotta Composting 50-Plant Garden Tower by Garden Tower Project


The website contains several ideas for using the Garden Tower in your gardenscape.  They also teach you how to garden with compost, how to recycle within your Garden Tower and how to water, and reuse water, to keep your garden hydrated.  There are guides on extending your growing seasons, as well as gardening inside.

Even if you don't purchase the Garden Tower (which you should really consider...it's a fantastic system), visit the website, check out the resources and see the future of microfarming.
Terracotta Composting 50-Plant Garden Tower by Garden Tower Project
1 Comment

Urban composting

11/17/2015

 
Composting is a sure fire way to get healthy, nutrient filled,  soil.  When composting in the city, you face a set of problems that rural and suburban green thumbs don't face. Neighbors complain about the smell.  It takes a lot of space. What do you do with the soil you've composted?  I'd like to address some of these issues here.

Composting doesn't have to take a lot of space, and if it's well maintained, the odor can be kept under control.  Here is information on urban and suburban composting.

Although I have a large yard, the majority of my composting is done using a small dark colored storage bin with a lid for my composting. I drilled some small holes in the lid, and about twice a week I give it some mighty shakes to get things moving again. You can also use a wooden crate, which is mor earth friendly. In wood, the compost doesn't get too damp so the smell isn't quite an issue.  Whenever it starts to smell, I throw some brown compostable in there; ie, paper, dry leaves, etc.  I dump the compost into my raised garden beds in the spring, and start over again.

Using a similar concept, I've seen plastic drum barrels with lids that would be really handy for the mixing.  Wooden barrels would work even better, again, because the compost doesn't get too wet.  Just turn the barrel on its side and roll it around.  That will get all the good stuff moving and mixing!

Still others use redworms for composting.  In this method, again you use a bin with small holes.  Start with your redworms (you can get these online or in bait shops and animal stores).  Place them in a moisture bedding (shredded newspaper, straw, leaves) and a handful of sand for grit, shake the container to create air pockets, and get your redworms busy!

These are all three wonderful options, but I recently ran across a dream come true composting.  It's called the GreenCycler, and it's made by Ecotonix.  It's an attractive stainless steel composter that's the size of my Keurig machine.  It's small enough to sit on your kitchen counter, but powerful enough to compost up to 1 gallon at a time.  You simply lift the lid, drop in your compostable, shut the lid, crank the handle, and let it compost!  The compost is in a drawer at the bottom of the unit; simply remove it and either use the fresh compost or add it to your compost pile.  No smell, no mess, and very little space.  I'm saving to get one!  Click on this affiliated banner to find out more about this amazing machine, and to see how it can help you compost in the city.​
Picture

There've been mistakes...I've made a few...

11/10/2015

1 Comment

 
Picture
Going into any new endeavor can be difficult.  You are bound to make mistakes  I am a good chicken owner but there have been plenty of mistakes along the way.  Thankfully my chickens forgive me, and I'm treating all mistakes like a learning process.  Here are some highlights of my low times.

That time I bought too many chickens
Once upon a time, my town only allowed homeowners to have three chickens.  THREE, as in, not nearly enough chickens.  In all of my research, I learned that when you order chickens online, at least one of them typically doesn't make it through the trip.  With that in mind, and knowing we could only have THREE chickens (again, not nearly enough), I ordered 4 chickens from Estes Hatchery in Springfield, MO.  Imagine my surprise when my husband picked up the chickens, and informed me that I had FIVE chickens.  Not FOUR like I ordered, not THREE like we thought we would have...I HAD FIVE CHICKENS!  I was well over the limit.  I kept them well hidden until my city passed an ordinance allowing six chickens.  At that time, I got two (okay, three) more, which led me to my next mistake.

That time I settled for a coop
I had been warned.  Everyone had told me, but I refused to listen.  Get a bigger coop!  You WILL want more chickens, and you WILL want / need more space for them.  Instead, when they were ready to go outside, I bought a 4-6 chicken coop, complete with a ramp, nesting boxes and an enclosed pen.  I thought it was glorious.  I thought it was cute.  I looked forward to painting it the same color as my house.  But then, my chickens grew.  And I got new chickens.  And they grew.  And before long, there was squawking.  There was arguing.  The little chickens ended up sleeping under the coop, not in it.  Something had to be done.  So, I built a bigger coop.  To me, it's the palace of all coops.  Nice windows, curtains, decorations, lights, heat, a sliding door, lots of comfy roosts...I love it!  You can see how I did it here:  Palletpallooza and Chick-Inn.  I am so proud of it!  Except for some of the frame and the roof, I did it all myself.

That time I got too creative with feeding them
I'll admit it.  For a while, I just wanted the coolest, newest, most innovative inventions for my chickens.  I wanted to neighbors to gasp in delight when they saw my setup  I wanted them to realize just how spoiled my girls were.  We had some leftover PVC pipe in the garage, so hubby and I made a fancy tube feeder.  We connected it to the side of the fence, and the girls would gather around eating out of the tubes.  I had a lid on the top that was supposed to keep water out of the tube.  It was beautiful, and I thought it was a great idea!  I mean, MY chickens would NEVER eat off the ground.  But then I noticed something interesting.  They were pulling the food from the tube and eating it off the ground.  WHAT!?  Then it started raining.  It rained a lot in Kansas City this spring.  And before long, the lid to the PVC feeder couldn't do its job.  There was a blockage from the wet food in the tube.  A couple of hours of wet food caused a horrible stench.  I finally gave up and started tossing the food on the ground.  My hens were happy scratching around, and I was happy to get rid of the tube.

That time I spent too much money on fencing, and it still didn't do the trick  
In the spring, my girls would start hopping around, so I purchased a 36" detachable dog fence.  It was $80 and I thought it was perfect.  Once summer hit, my older chickens realized they could fly and the dog fence no longer worked.  I purchased a 41/2' chain link fence for $175, and I attached it to the coop with a wire chicken tunnel (we called it the CHUNNEL).  Before long, my girls were scaling that fence almost daily.  As chicken friendly as my neighborhood is, I didn't think it was that big of a deal, until my chicks started wandering into other people's yards.  At that point, I was already working on the new coop, and I had a really tall fence planned.  This one had a 5' fence and a huge yard!  with the fencing and the posting, it cost about $65.  I did have two smart chickens who learned that if they jumped on the roof of the coop, they could escape.  I was exhausted and out of ideas at this point, so I took the easy way out and learned to clip their wings.  I only clip the wings on my escapees, but apparently word got out to the other chickens, because nobody's flown the coop in a few months.

The time I lined the pen with pine shavings
If the pine shavings were good enough for the coop, surely they would also help keep the outdoor pen warm in the winter, right?  Wrong again!  This lesson was long lasting and hard to live with.  Shavings are great for keeping the smaller coops warm, while still smelling fine.  I figured the same would go if I spread them outside in the yard during the winter.  What I found out is that the chickens don't spend a lot of time outside in the winter, and once the spring snow melt and rain start, you get a sticky, goopy, smelly clump of stink.  It was so awful that we could sometimes even smell it inside the house.  I ended up spending hours raking up goo and putting it in the garden, where I composted and turned it into decent soil.  Now I just have my yard for the chickens, sand in the bottom of the coop, and straw in the nesting boxes.  I have spearmint plants, and a couple of times a week I snip some, stick it in the coop window to dry, then crush it in the straw.  I also rake poo out of the sand twice a week.  This keeps it clean, pretty fresh smelling, and definitely easier to tolerate than the shaving disaster.

When I decided only the best food would do for my girls
This was another expensive mistake.  I knew I wanted medicine free, all organic food for my girls.  I figured that the higher end food would be healthier for them.  So I would lug home huge bags of feed twice a month, cringing about how the expense may outweigh the benefit of the cost of eggs.  As I was getting my third bag, a gal came up to me and said, "You must be on your first flock."  I asked her how she knew and she said, "You're purchasing XXXXXXX brand of food.  You don't need to do that.  You need to get Country Feed.  It's the same stuff only cheaper."  After over a year of using Nutrena Country Feeds, I have to agree.  My girls have all been healthy, even through molt, and the feed is quite gentle on my purse strings.  I AM NOT AFFILIATED with Country Feed, but when I find a good product, I want to share it with you.

There have been other mistakes along the way.  I'm sure there will be more.  My girls are doing fine, and none seem the worse for wear!  Chickens are hardier than we think.
Picture
My chickens are happy, even when they are in time out for running in the neighbor's yard!
This shows lots of mistakes...the too small coop, the short fencing and the feeding tubes.
No mistakes here...just happy chickens enjoying a tree in the shade! This tree now shades their new coop.
1 Comment

Why Chickens Love Fall, Too

11/9/2015

0 Comments

 
PicturePHOTOBOMB! Mimi being silly in the cool, autumn weather.

  There is something really amazing about autumn.  Gorgeous colors, cooler temperatures, bonfires, warm meals, fall decorations, all used to enhance our daily lives.  Did you know your chickens also love autumn?

Falling leaves:  Chickens love leaves.  The drier the leaves, the happier the chickens.  They love to forage for bugs in piles of leaves.  They love to scratch the leaves (I think they also love the crunchy sound of their feet in the leaves).  All of this equals a nutrient rich ground cover and mulch for you to use in your gardens!  We have a large yard with lots of 100-year-old trees, so we have plenty of leaves for our girls.  Even if you have a small yard, your neighbors will love to have a place to dump their leaves.  You're doing them a favor, too!

​Cooler Temperatures: My chickens are very active this autumn!  Chickens are usually pretty hardy and will adapt to their environment.  In the summer, they seek shade, cooling dirt baths and water.  In the winter, they huddle, stay inside the coop and out of the wind.  The fall is pretty invigorating to them.  With the cooler temperatures come more energy.  My girls are running around, playing, scratching and squawking.  I am having a lot of fun both watching and playing with my girls this fall.


Bonfires: Chickens love dirt baths.  I know...bathing in DIRT?  How are they getting clean?  The grittiness cleans oils off their skin. Think of how good you feel after scratching your back.  It's a similar feeling for chickens.  Dirt baths come in many forms; soil, sand, diatomaceous earth...and ash from your bonfire.  I typically shovel a few scoops of post bonfire ash into their bath tire for them to enjoy.  **PLEASE NOTE**  please allow time for the ash to cool.  I usually wait at least 24 hours so my birds don't burn their tender skin!

Warm Meals:  As much as chickens love cool, icy meals in the summer, they love warm meals in the winter.  I heat their treats just a bit before giving it to them.  They love warmer leftover vegetables and  Quaker Oatmeal.  I simply make the oatmeal with hot water and bring it out to them in their bowl.  Don't add anything; just feed them heated oatmeal.  YUM!

Fall Decorations:  Fall decorations are great for chickens.  After Halloween, my friend donated her Jack o'lanterns to my chickens.  They have feasted on them for a week!  The flesh and the seeds are really healthy for chickens. The Indian corn you see in decorations is a delicious treat for birds.  Soften the kernels just a little bit.  Chickens love apples.  Just chop them and get rid of the seeds.  Seeds contain cyanide and could make your hens sick.  The straw leftover from hay bale decorations make a wonderful bedding alternative in your coop.  I use sand in the floor of my coop, but I use straw in the nesting boxes.  This is a pretty inexpensive time of the year to get hay bales; even better if your friends used them for decoration and are willing to donate them to you.


As you see, chickens thrive during the fall!  Take the time to reap the benefits of autumn's natural abundance, and enjoy this time bonding with your chickens.  Before long, it will be time to winterize your coop in preparation for cold, snowy days.

Picture
Picture
Ilyana says, "Look, Girls! We got a pumpkin treat today!"
Picture
MMMMMM Nothing quite as tasty and healthy as pumpkin.
0 Comments

    Author

    Write something about yourself. No need to be fancy, just an overview.

    Archives

    July 2018
    May 2017
    March 2017
    April 2016
    March 2016
    February 2016
    November 2015

    Categories

    All
    Chickens
    Compost
    Gardening
    Guest Blogger

    RSS Feed

Proudly powered by Weebly